PhotoCAD Guides
A 3D laser scan, a LiDAR or walk-through scan, a Matterport or Polycam capture. Export a view of it as an image, and PhotoCAD drafts the floor plan, elevation, or section as a scaled DWG.
Export a plan slice or an orthographic view from Cyclone, SCENE, RealWorks, or ReCap, and PhotoCAD drafts the plan or elevation.
Floor plans, elevations, and sections of existing conditions, each from an image exported from a laser scan and converted in PhotoCAD. Drag the slider to compare.
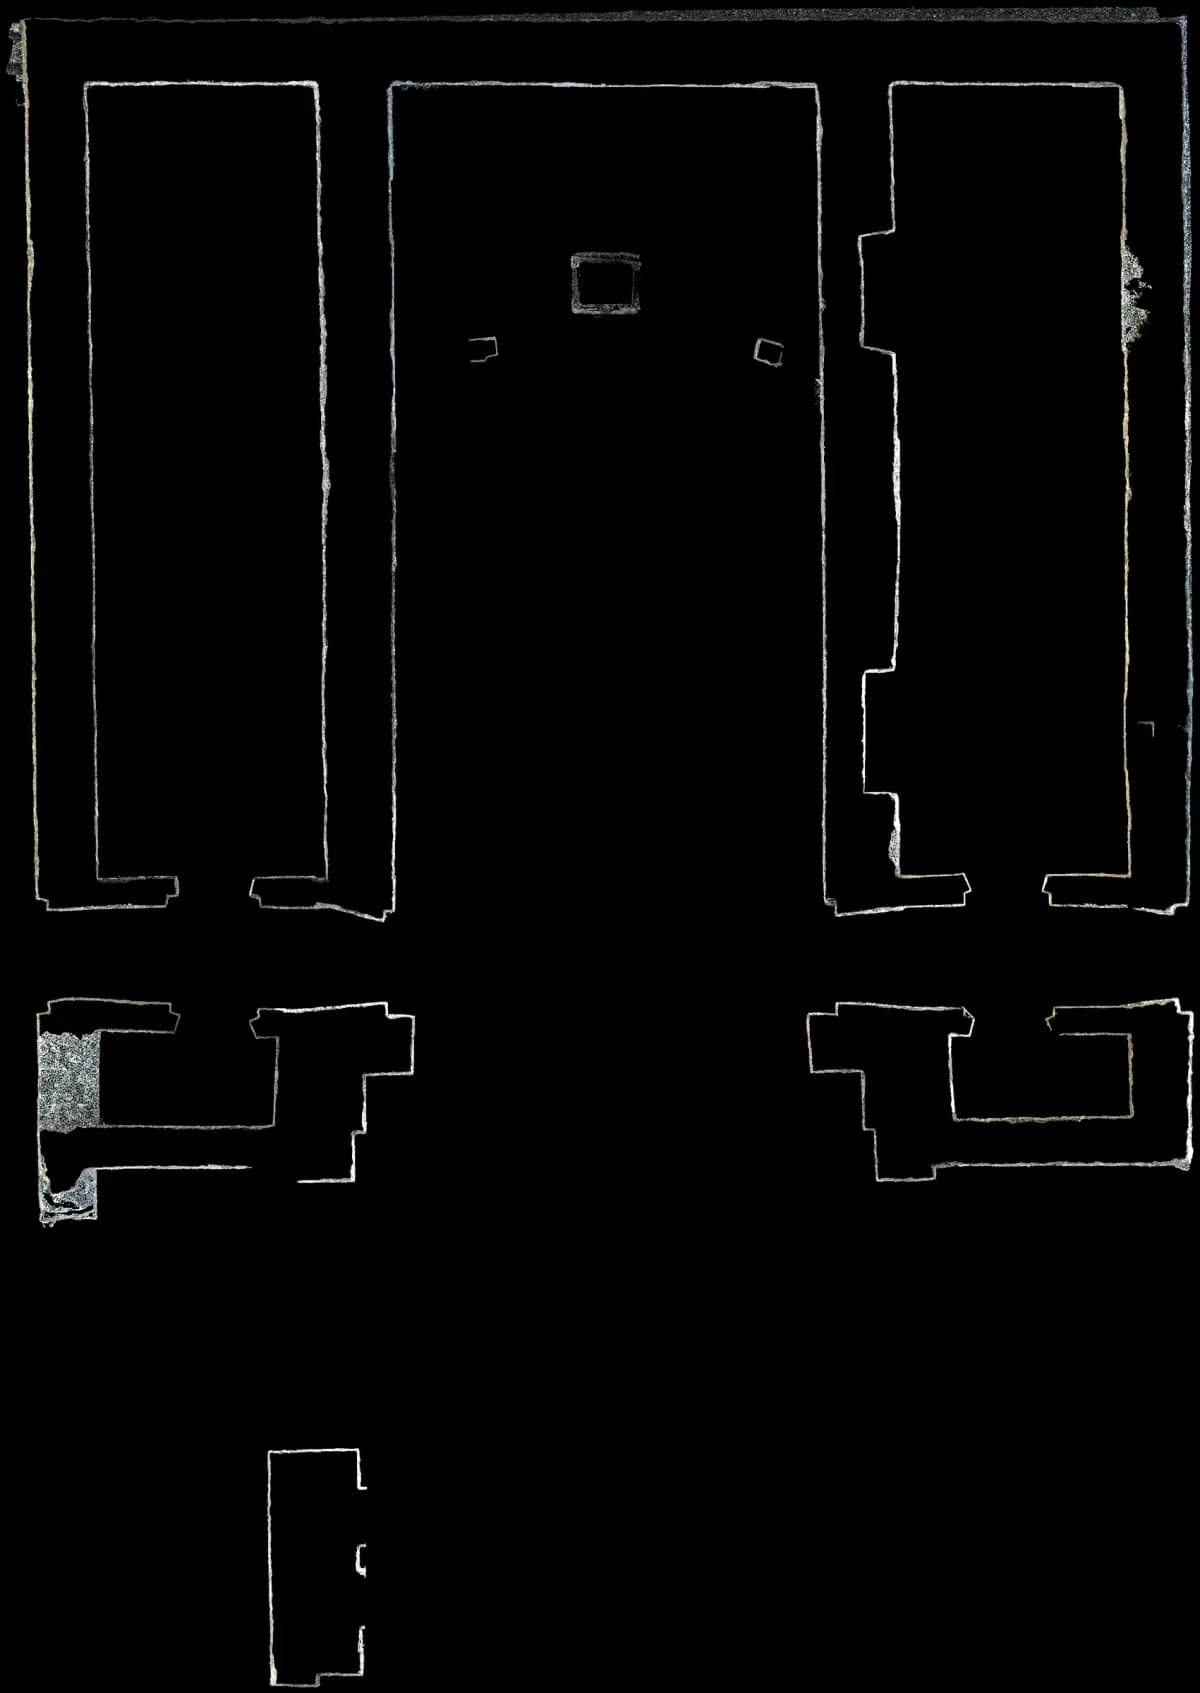

Church ruin, Zobor Hill, Slovakia. Laser scan: P. Gawronek, CC BY 4.0, adapted.
Cut the point cloud about a meter above the floor and export the view from above. PhotoCAD draws both faces of every wall as closed outlines, with the openings and piers, and leaves the stray points out.

| Method | Time | Cost | What you get |
|---|---|---|---|
| Trace it by hand | Hours per drawing | Your time | Slice the cloud in AutoCAD or Revit and draw over it, wall by wall. Exact, and the slowest part of the job. |
| Point-cloud software | Hours, partly automatic | From €1,200 a year per seat | A plug-in snaps lines to clean edges inside your CAD program. You still draw masonry, ruins, and anything irregular. |
| Drafting service | Days | Hundreds of dollars per elevation |
In your point-cloud software, clip to one floor, one wall, or one cut and export the view as an image: a slice from above for a plan, a view square-on for an elevation.
Every point-cloud program can show the view PhotoCAD needs, and most can save it as an image. This is where to find the export.
| Software | Plan slice | Elevation or section | Worth knowing |
|---|---|---|---|
| Autodesk ReCap Pro | Top view, a limit box around one floor, then Export Image | Ortho camera, a limit box around the wall, then Export Image |
Scanning a building takes an afternoon. Drawing it takes days: someone slices the point cloud in AutoCAD or Revit and traces every wall, opening, and stone by hand to make the floor plans, elevations, and sections the client asked for. In a typical measured survey the office time is several times the time on site, and this scan-to-CAD step is where it goes.
Tracing tools cannot take that work on, because they follow pixel edges, and a point cloud has no lines in it, only millions of points. PhotoCAD works from a semantic understanding of the image instead. It recognizes what the exported view shows, the walls, the openings, the masonry, and drafts it as clean, proportionally accurate vector lines, leaving out the speckle, the gaps, and the stray points. Set the scale from one length you know, place the drawing on a sheet, and download a DWG that opens at real size.
PhotoCAD does the initial drafting, not the surveying. The drawing follows the image you export, so its accuracy comes from your scan and the scale you set. Review it against the cloud, correct what needs it in CAD, and issue it as you would any drawing from your office.
Measurements, cursors, grids, tags, and markers are part of the picture. Turn them off before you export.
Export a slice or an elevation from your scan and see PhotoCAD draft it in a minute.
Your first 3 conversions are free — no card required.
Handheld and mobile SLAM scans, even in intensity grays on black. Export the view as you see it.
A Matterport, Polycam, or Scaniverse floor plan or square-on view, turned into an editable DWG.
A plan or section of a linked point cloud in Revit, or a screenshot from any viewer.
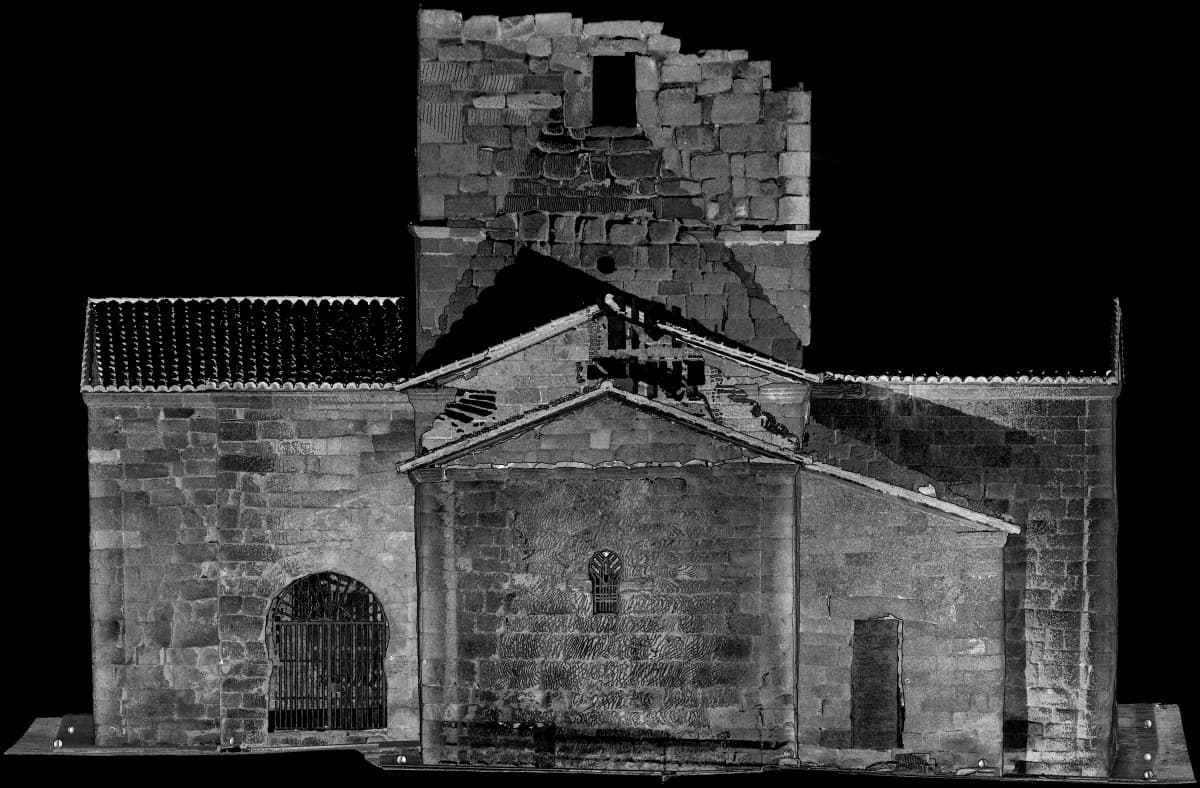
Santa María de Melque, Spain. Laser scan: J. Raimundo, CC BY 4.0, adapted.
An orthographic view of the front, in intensity or color. PhotoCAD picks out every stone, the horseshoe-arch door, the window, and the roof tiles, and ignores the scanner noise.
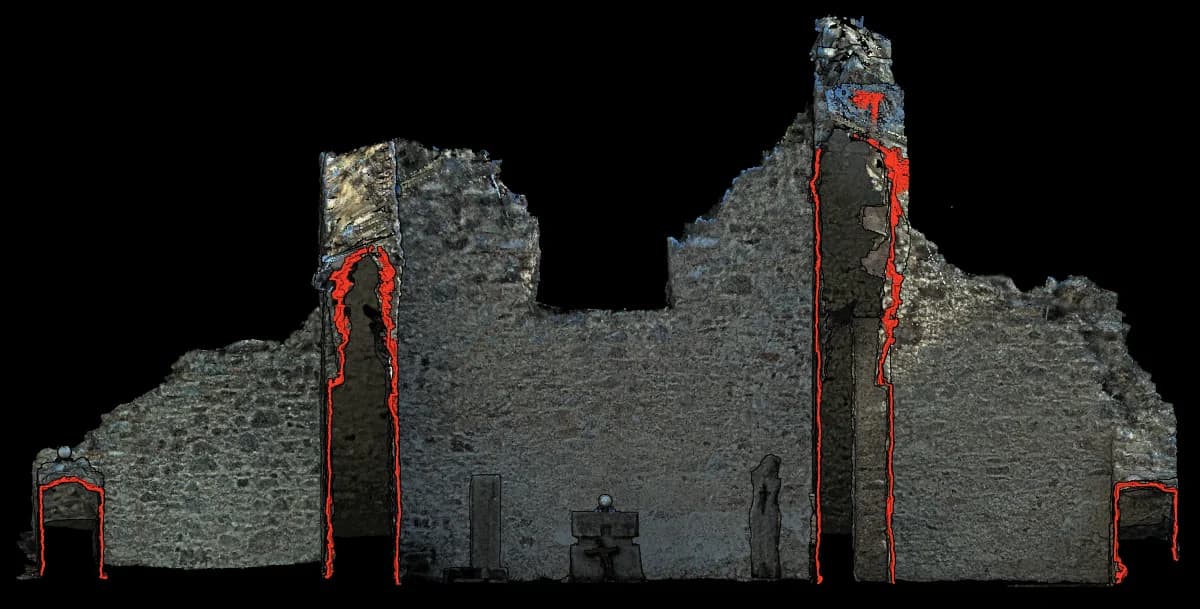

Church ruin, Zobor Hill, Slovakia. Laser scan: P. Gawronek, CC BY 4.0, adapted.
A vertical slice through the building. PhotoCAD draws the cut walls and the interior face beyond them.
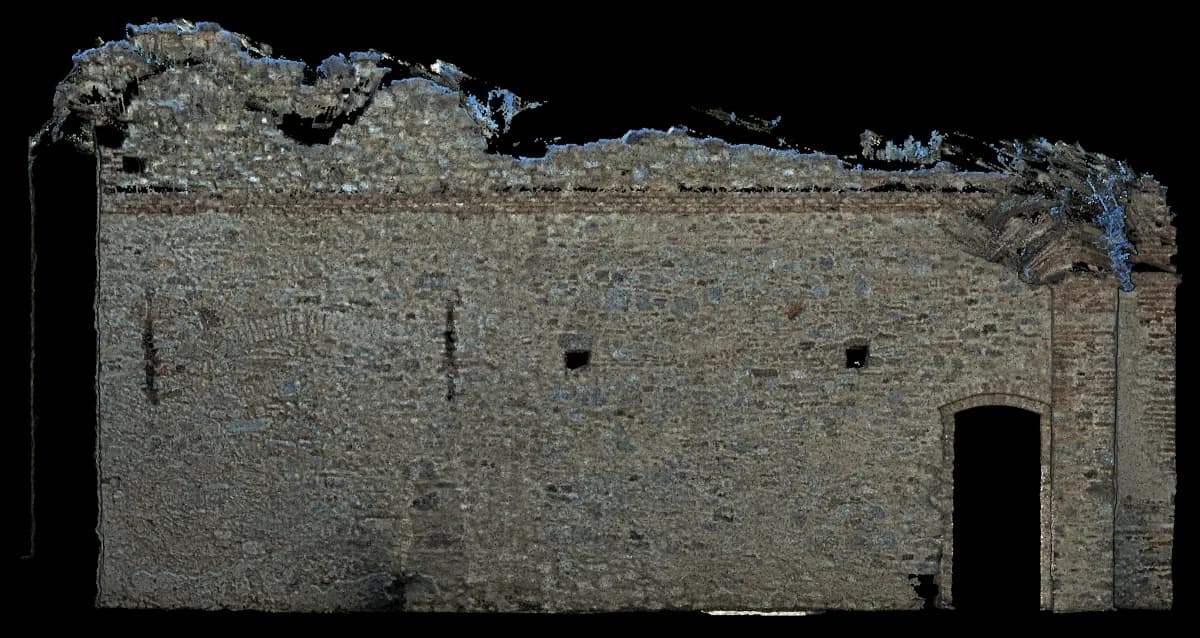

Church ruin, Zobor Hill, Slovakia. Laser scan: P. Gawronek, CC BY 4.0, adapted.
One wall seen square-on from inside the room. PhotoCAD draws the masonry, the openings, and the arches, stone by stone.
| Send the scan out and get plans and elevations back to your layer standard, then check them. |
 PhotoCAD PhotoCAD | About a minute | ~$1 per drawing | Drafts the view you exported as clean linework at real scale, on a sheet, as DWG. You review it and finish it. |
|---|
Drop the PNG, JPG, or TIFF into PhotoCAD, up to 150 MB. One view per upload; a whole building is several.
PhotoCAD recognizes the walls, openings, and masonry in the view and draws them as clean vector lines, leaving out the speckle, the gaps, and the stray points.
Click the two ends of a length you know, the longer the better, and type it. The whole drawing scales to match, in meters or feet and inches.
Add dimensions and labels, and lay the plan, elevations, and sections on a titled sheet at 1:50 or 1:100.
Compare the drawing with the scan, then open the DWG in AutoCAD or Revit at real size and assign the linework to your layers.
3 free conversions. No card required.
| Leica Cyclone REGISTER 360 | Ortho Image from above, with a slice thickness | Ortho Image on a vertical plane | Set a high pixels-per-unit so fine detail survives. |
|---|
| Leica Cyclone 3DR | Extract OrthoImage, top view | Extract OrthoImage, elevation view from three picked points | Saves a world file beside the image. |
|---|
| FARO SCENE | Create Orthophoto from above | Create Orthophoto on the facade plane | Empty areas export as transparent; PhotoCAD reads them as white. |
|---|
| Trimble RealWorks | Ortho-Projection on a horizontal plane | Ortho-Projection on the facade plane | Choose true color or intensity. |
|---|
| CloudCompare (free) | Top view, cross-section tool, then Render to File | Front view, cross-section tool, then Render to File | Change the background first: its default is a blue gradient. |
|---|
| Autodesk Revit | A plan view cut through the linked cloud, then Export > Image | An elevation or section view of the cloud, then Export > Image | Hide grids, tags, and elevation markers first, so they stay out of the drawing. |
|---|
| Matterport | The schematic floor plan image | A square-on view of the space | A quick alternative to ordering a CAD file of the space. |
|---|
| Polycam | The floor plan, or a top-down view of the scan | A square-on view of the scan | A phone scan is less exact than a laser scan: check the key dimensions. |
|---|
Walk-through scanners (NavVis, GeoSLAM, BLK2GO) and any other software: open the registered scan in one of these, or take a square-on screenshot with the tools and cursor hidden.
Take the ceiling off a plan and the foreground off an elevation. One floor, one wall, or one section per image.
Export at the highest resolution your software offers and keep to the part you need: a room, a bay, an elevation.
A wall you measured, a door, two control points. One known length sets the scale of the whole drawing.